In the world of penetration testing, as I’m often involved in with ROS, those taking on the role of attackers are referred to as the “red team”, and those defending as the “blue team”. Red team people are often regarded as the rock stars of INFOSEC, but one key difference is that red-teamers only have to succeed in their efforts once, whereas blue-teamers have to succeed every time. Unfortunately, when the blue team succeeds, nothing notable happens, so they don’t get much of the glory.
This song is a tribute to the unsung heroes of the blue team; Gotta keep out the bad guys, baby!
Unsurprisingly, the “gotta keep out the bad guys” line was about the first thing I thought of, and everything stemmed from that. There were lots of blue-teamy things I could have written about, but I preferred to keep it short. The string-bend bass riff was the first bit of music, then the funky guitar parts, though I ended up dialling them back a bit in favour of some chuggy rhythm guitar. As in my other tracks, I was keen to use Synthesizer V for vocals, and the backing vocals came out really well. I wrote the lead guitar solo, then thought a higher vocal part alongside it might work, and it was also a chance to have a dig at the red team; it’s my favourite bit of the song.
There are a lot of guitar parts overall (all played by me), and only some small pad and organ keyboards for backing. I was especially happy that I managed to pull off the more aggressive bass parts and the lead solo. As usual, the drums were all done with Logic’s Drummer instrument, which does a great job without getting drunk and falling asleep during rehearsals, and its excellent “follow” mode meant that the drums could match what I’d played on the bass, rather than being some disconnected pattern.
As usual, I’m not too happy with my vocals (PRs welcome!), but Logic’s Flex Pitch editor works enough magic to get the job done. This track could really do with someone that can get a bit more grungy in the verses, with a hint of Elvis for the chorus.
[Intro]
Don’t break a sweat
from a constant threat.
We’ve got the tools to meet them
and firewall rules to defeat them.

[Verse]
We’ll take our time
to build our defences.
No need to be concerned,
we know the consequences.

They’re going to attack
our networking stack,
but we can keep them guessing as
their port scans come to nothing.

[Chorus]
Because, I’m on the blue team, baby,
we’ve got to always win.
Gotta keep out the bad guys,
can’t ever let them in.

Come join the blue team, baby,
we need your awesome skills.
Come watch that bad actor
try to guess my second factor.

[Solo]
Oooh red team stays outside,
don’t want you here.
Just go away
and don’t come back.
You’ve gotta find another way.

[Verse]
Alarm bells ring
from a tripwire’s string.
Logs tell a sad, sad story
of a search for a way in.

SOC screens flash
for a matching hash
We’ve seen this one before
and there’ll be many more

[Chorus]
That’s why I’m on the blue team, baby, (ooh yeah)
we’ve got to always win. (blue team, blue team)
Gotta keep out the bad guys, (ooh yeah, gotta keep out the bad guys baby)
can’t ever let them in.

Come join the blue team, baby,
we need your awesome skills.
Show your strength, let it shine,
help take those APTs offline

We’re on the blue team, (ooh yeah)
got to always win. (blue team, blue team)
Gotta keep out the bad guys, (ooh yeah, gotta keep out the bad guys baby)
can’t ever let them in.

We’re on the blue team, baby,
we’ve got to always win.
We’re the unsung heroes.
(gotta keep out the bad guys, baby)
There’s a problem here though – that unique validation on the email field is subject to a race condition. If two requests are received very close together, both can pass validation, but then the second one will fail with a duplicate key error on the User::create call. While that sounds unlikely, it happens for real sometimes, and you’ll see something like this in your web logs when it does:
The 201 response is a successful creation, but it’s followed a second later by a 500 failure for the duplicate request. The Laravel log will then contain one of these:
To deal with that we can trap the creation error, and return an error response that looks the same as the validation error:
try {
$user = User::create(
$request->only(
[
'email',
'name',
]
)
);
} catch (QueryException $e) {
//1062 is the MySQL code for duplicate keyif ($e->errorInfo[1] !== 1062) {
//Rethrow anything except a duplicate key errorthrow $e;
}
return response()->json(
[
'error' => true,
'message' => 'That email address already has an account.',
],
Response::HTTP_UNPROCESSABLE_ENTITY
);
}Code language:PHP(php)
This way, as far as the client is concerned, it was a straightforward validation failure with an appropriate 422 error code, and we don’t get spurious 500s clogging up our error logs.
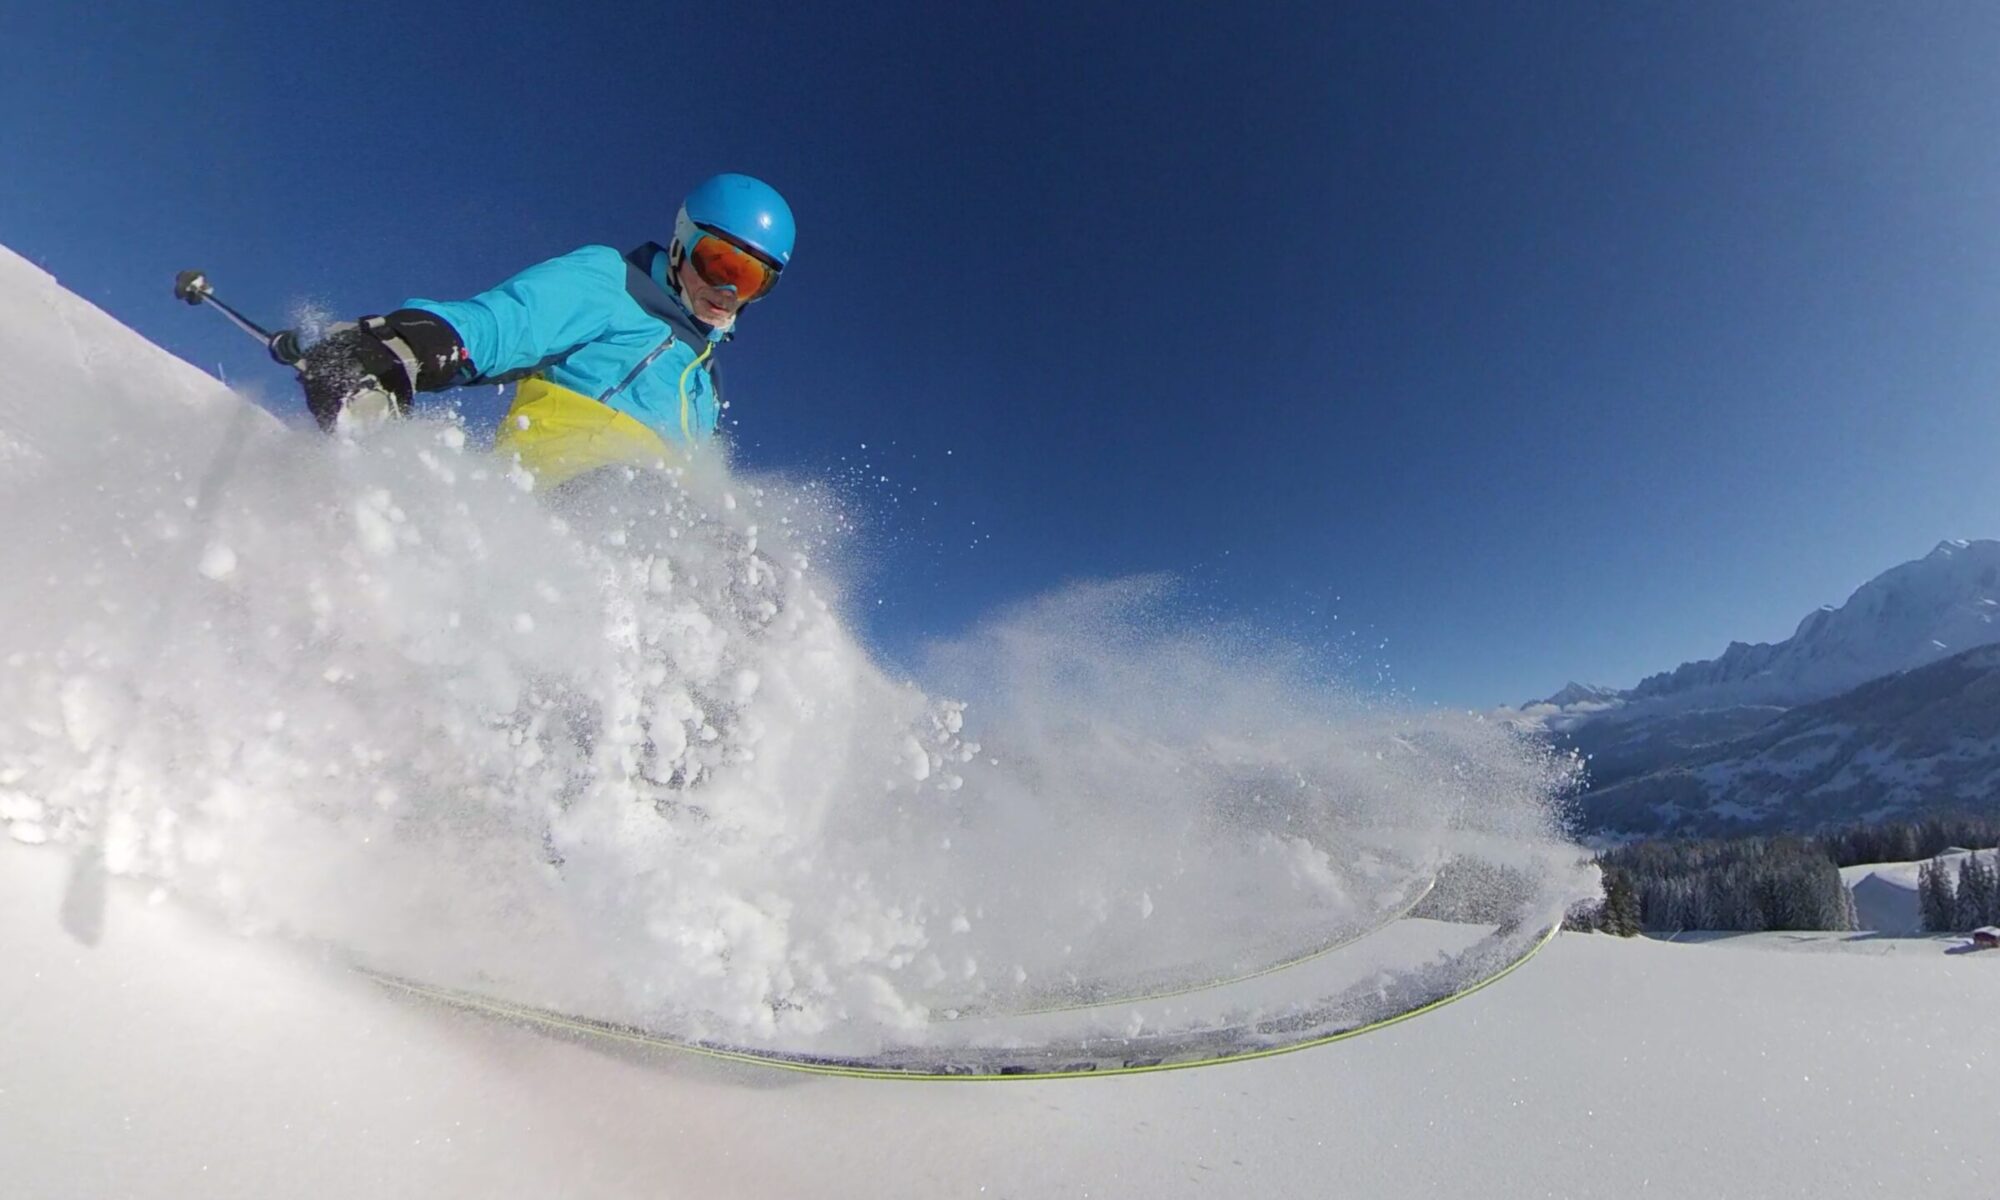
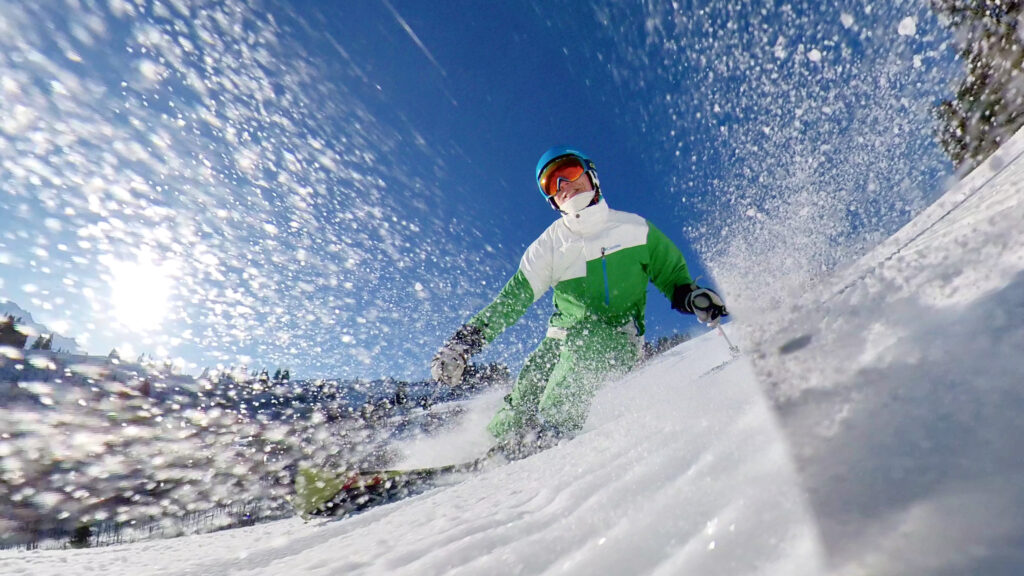
I post skiing videos fairly often, and people keep asking me how I make them, since by most normal understanding of shooting video, they seem like magic.
Skiing fast in Combloux, France on a nice sunny day, filmed by my talented, invisible friend
Is there a drone that follows me? Do I have a friend that can ski backwards very fast while filming, staying out of shot, and not casting a shadow (a vampire?)? Nothing quite so exotic, but it’s still pretty clever.
The Camera
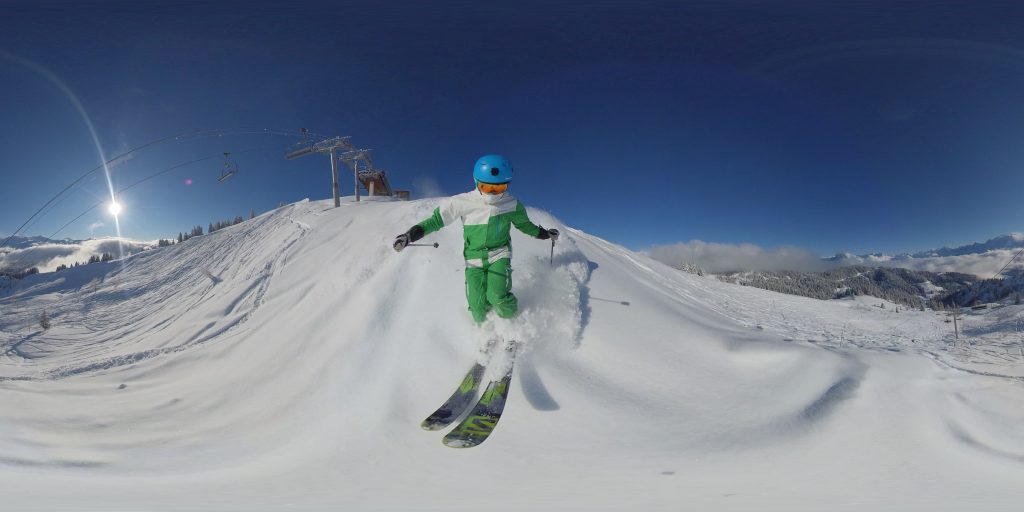
I use an Insta360 One X camera. As you might guess from its name, it shoots 360° video, that is, it captures a complete sphere, looking in all directions at once instead of just a rectangle pointing in one direction. It achieves this by using two cameras and two fisheye lenses, mounted back-to-back, each capturing slightly over a 180° field of view as two square images. These are then mapped into a 2:1 rectangular representation (which conveniently works with common image and video formats like JPEG and MPEG-4) where the poles are the top and bottom edges, which implies a lot of distortion, a bit like a Mercator map projection. This is a full spherical frame image in this format – the distortion is clear (my skis are not the size of surfboards), but the pixels on the left and right sides will match when wrapped around:
A spherical image mapped to a 2:1 rectangle
The combined resolution of these two sensors is 5.7k (i.e. more than 4k), however, you need to bear in mind that all those megapixels have to cover a complete sphere, so you really need it to be this high if you’re going to render out videos that only look in one direction, and thus only use a small portion of the original view.
The “slightly over 180°” field of view is important as it means that when the two video streams are combined, there is a discus-shaped region centred around the camera that is hidden from view, and this is used to make the camera itself (and the selfie stick it’s mounted on) effectively invisible, without having a visible discontinuity (join) between the two image sources.
It’s possible to see the join sometimes, especially when only one lens is exposed to the sun – modern optics are good, but there’s only so much they can do! In this weird perspective, the join is running roughly vertically a bit to the left of me, roughly perpendicular to the lens flare ray from the sun, which stops at the join. The sky is slightly lighter on the left side of the join, probably due to lens flare:
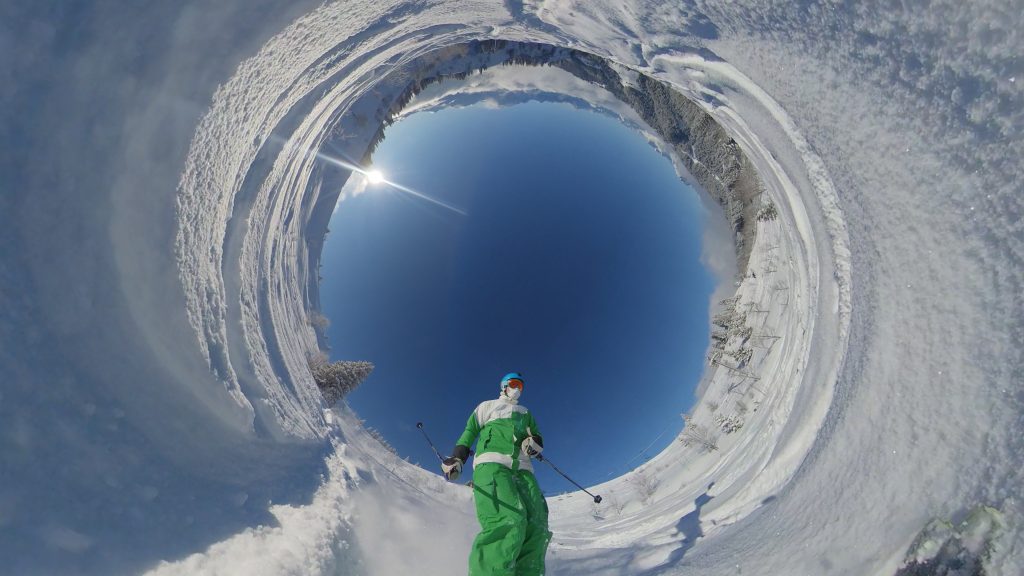
You might have noticed that using spherical images requires a new perspective (ha!) on taking pictures and planning shots; Since you can rotate the view in all directions and zoom in and out, you can produce some very unusual perspectives that are not possible any other way. In the image above, the camera is effectively looking straight up and is zoomed out a long way, so the horizon around it appears as a circle.
One advantage of fisheye lenses is that they have effectively infinite depth of field, so everything is always in focus, and it doesn’t need autofocus. On the other hand, you’re not going to get any subtle bokeh effects!
Stills
You can extract still images from the video stream as either rectangular frames, or full 360° images (as I did above). The camera has a higher-resolution stills mode, however, that’s not really possible to use at speed. The stills quality from video streams is remarkably good.
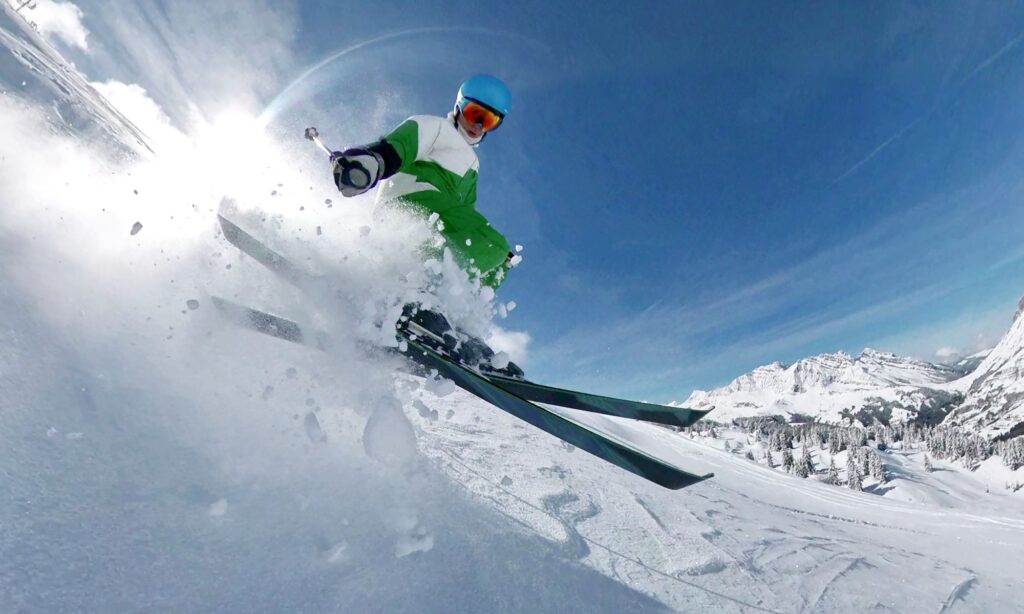
I’d be delighted if someone had taken this picture of me (no doubt after much setup) – that it’s a selfie is borderline miraculous!
I’m particularly pleased with this shot – the spray of snow was caused by the camera hitting the ground at speed, and the camera itself made a gap in the spray, which happened to line up with me!
Stabilisation
The camera has “FlowState” stabilisation, which uses accelerometers and gyroscopes to keep track of where the horizon is and keeps it flat and steady, regardless of what angle the camera is held at – when you’re filming in all directions at once, it doesn’t really matter which way the camera is “pointing”, in fact the whole concept of pointing it at something doesn’t really apply. This stabilisation is extremely good, keeping things nice and smooth even during really quite violent movement and vibration, but it’s also partly responsible for the viewpoint feeling disconnected from the subject.
Mounting
The traditional place to mount an action camera like your average GoPro for skiing is on top of your head, attached to a helmet. That’s fine as it points forwards, but it means you never star in your own movies, and the resulting footage tends to be pretty monotonous. Mounting a 360° camera there is going to be a bit dull too – it means you lose the view of the ground because your helmet will get in the way, but your friends might be nicely captured. To get a nice perspective on yourself, you need to shoot from a bit further away – selfie stick to the rescue!
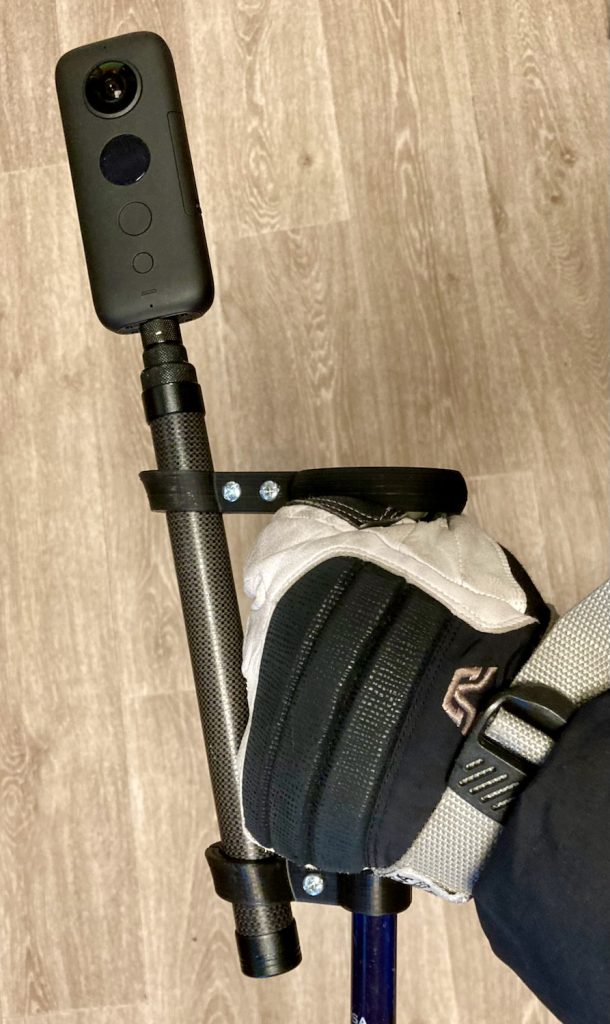
The camera isn’t that heavy, but when it’s waggling about at the end of a 1.2m carbon fibre telescopic selfie stick in a fast moving situation, it can be hard to control. When skiing you use your hands for holding your poles and partly for balance, and it’s actually painful to hold stick and pole at the same time. To counter this, I designed and 3D-printed a mount that clamps the stick to my ski pole fairly rigidly, and also offsets the angle a bit – otherwise there would be a risk that the “invisible selfie stick” feature would also make my ski pole disappear, but it also gives you a bit of creative control as you can easily move it between front and side viewpoints with a twist of the wrist.
The camera mounted on my bracket – finger space is a bit tight with fat gloves on
This mount is a great improvement, and makes for much steadier shots and safer precarious camera positioning (like 2cm from the ground at 100km/h!). You still lose a bit of motion in that arm (watch how little my left arm moves compared to my right in the video above), and the balance of your poles changes a lot, but it’s quite workable.
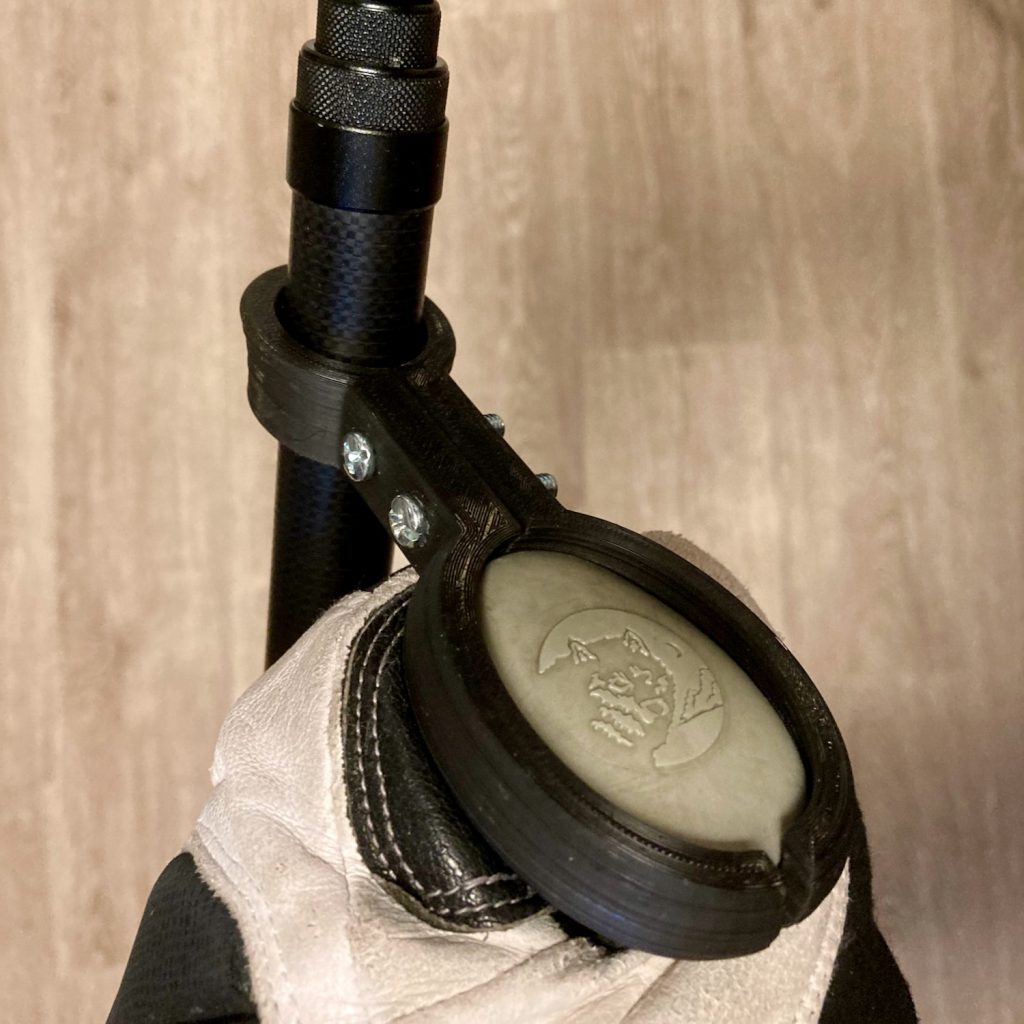
My ski pole mounting bracket, top view
Snowboarding is a bit easier because you have your hands free, and the results can look straight out of a video game:
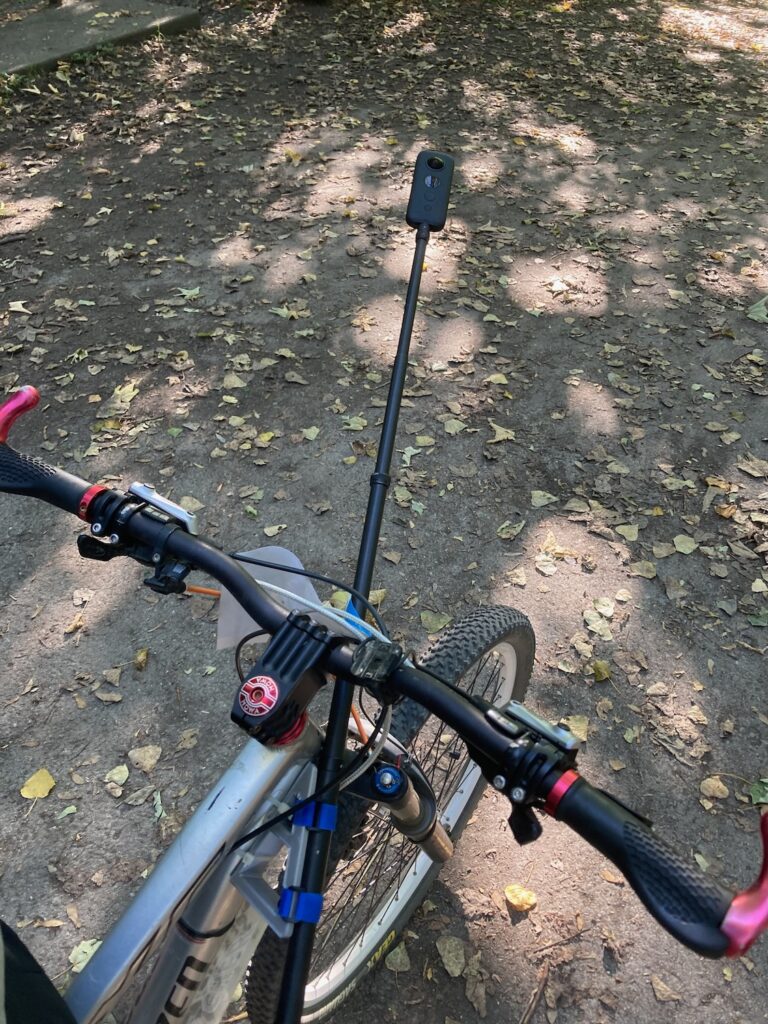
I also printed a bracket to mount it on my mountain bike’s down tube, and this taught me a couple of things: Vibration on bikes is much more violent than on skis, so the selfie stick rattles (the telescopic parts rattle inside each other) and wobbles a lot more; you go a lot closer to things on a bike, and it’s easier to hit the camera.
A new take on jousting
The end result still looks quite cool though.
Editing
Insta360 have an iPad & iOS app called… Insta360. The iPad version is great, but the phone one is quite usable too. You have a choice of aspect ratios, trimming and editing, adding soundtracks, colour enhancements, filters, and more. As well as nicely smoothed view angle and zoom factor manual edits, it has some very clever features for auto-tracking a subject. Remember that if you’re rendering out a normal-looking video, as I’ve done here, it’s not just that you can choose your view angles – you have to; clips of the ground whooshing by or the tops of some trees and a bunch of clouds are not that interesting!
The software has some enhancement filters, though they are not very controllable – you can’t for example just “make it brighter”, you have to pick a filter preset that happens to look like what you want, then twiddle an amount slider. The dynamic range is really good – notice that in all these clips you can still see the snow texture in direct sunlight, the highlights are not blown out, yet there is still detail in dark areas.
Extras
Insta360 have some other mounts that could be interesting for skiing including a back mount that puts the camera above and slightly behind you for a 3rd-person perspective – just don’t ski under any low branches, and be careful on chairlifts!
They also have a GPS Action Remote gadget, which in addition to controlling the camera remotely, injects a GPS data stream into the video recording. In the editor this data can be used to drive on-screen speedometers and maps. I’ve not tried that, but I’d love to given that I’ve long had a thing about going quite fast. Here’s a clip of me doing that on the Mont Fort World Cup speed skiing track in Verbier, now sadly defunct due to the glacier’s retreat, which also shows how much video quality has improved since 2013 (it was shot on a Contour 1080p camera):
At the start you can see just how steep this is! I managed 147km/h (92mph) on this run.
Posting online
For the most part I share videos via Mastodon, Twitter, and Strava. All of these have similar restrictions/requirements for videos regarding size, video format, bit rate, duration, etc. I usually render full-resolution output from the Insta360 app at 100Mbit/sec, do any simple edits using LosslessCut, and then compress for final output using ffmpeg. The ffmpeg command I use is:
This compresses to just under 5Mbit/sec using the H.264 codec (sadly, vastly superior H.265 video is not accepted by these sites yet), scales the video down to 1280px wide (720p), sets the pixel format that most of these sites want, and also includes a 90% audio volume reduction, as it’s just really noisy otherwise.
Youtube has support for 360° videos, however, I find that these are actually mainly annoying to watch; rendering out a conventional rectangular clip just works better for me, and I’m the director around here…
Gripes
There are a few annoyances with this camera:
The tiny OLED screen is completely unreadable in bright sunlight.
There are only two buttons to navigate through all its menus and options, but I never know which one to press.
It’s very picky about the SD cards it will work with, though that’s understandable.
The battery life is reasonable, even in the cold, and while I printed a lens cover, the lenses seem to be surprisingly resistant. It doesn’t mind getting covered in snow. For some unknown reason, the 3 threaded sections of the selfie stick use a left-hand thread, which is annoying as it means that the action of tightening the camera undoes the selfie stick.
The One X is a few years old now, and Insta360 have since released newer One X2 and X3 models which solve the screen and controls problem by adding a small touch screen that’s more readable. It also makes the standard case a bit more robust and waterproof, has a bigger battery, better image sensor, and improved audio. Should Insta360 like to give me one to test, I wouldn’t say no!
I do work for a bunch of different clients, who variously use GitLab and GitHub. For many years I put up with the incessant problem of accidentally signing my commits as the wrong user. It’s just so easy to forget to set the right GPG key and email address when you just want to get on with a project. It’s not the end of the world, but it’s annoying.
Often the same thing goes for the SSH keys you use to push and pull from your git repo; it’s a bit too easy to be lazy and use the same SSH key across multiple clients, when a little isolation would be a good idea from a security perspective.
What if you could work some magic so that identities and GPG and SSH keys are set to the right values right from the start, for every project for each of your clients? Read on…
This whole setup reminds me very much of a post I wrote in 2009 (13 years ago!) on the “holy trinity” of DNS, TLS, and virtual host wildcards that allow you to dynamically host vast numbers of previously undefined sites without having to touch your web server config at all, a classic example of convention over configuration.
First of all let me introduce you to .gitconfig. This file usually sits in your home directory, so for me on macOS that’s /Users/marcus/.gitconfig. This file contains your global git defaults, and is an easy-to-read config file in an “ini” style (and no, those are not real values!):
[user]
    name = Marcus Bointon
    email = marcus@example.com
    signingkey = AC34DF5B434BB76
[github]
    user = Synchro
    token = f693251e52043a23fe5fbd955cff56ff
...
You’ll find lots of other sections in here, which you can read about in the git config docs. But we are only really interested in one option: includeIf. This directive conditionally includes another git config file into your settings, and one of the things you can make it conditional upon is the path to your project. This is useful. I typically set up my client’s projects in the macOS default Sites folder within my home directory. Each client gets a folder, and each of their projects lives within that. This provides a tidy location to put a separate .gitconfig file that can be applied to all of their projects. It ends up like this:
Each .gitconfig file only needs to include the differences from the defaults that are set in the primary config file that lives in your home dir. To set up the GPG signing key and email for all of their projects, the file would contain this:
And that’s it as far as GPG goes – commits will now be signed with the key and email address that are specific to this client, so when you set up your next project for them, you won’t have to do anything to set it up; it’ll Just Work™.
But what about SSH? The chances are that your client will have asked you for an SSH public key to add to their repo to provide you with sufficient access, but setting the GPG key doesn’t do anything towards selecting an SSH key for that purpose. You could do that using environment variables (which can be quite annoying) before, but fortunately, git 2.10.0 added the core.sshCommand config option that allows us to specify the SSH command that git uses for file transfer operations, and that can include a -i parameter to select an SSH identity (and -C to use compression for a possible speed boost). Add this to your client’s .gitconfig file, using the path to your client-specific identity file (not the public key which has a .pub suffix) like this:
Side note: I do hope you’re using Ed25519 keys for SSH; they’re newer, smaller, stronger, and faster than RSA keys, and they’ve been supported in OpenSSH since version 6.5 in 2014, so if your server doesn’t support them, you probably have bigger problems, or maybe you’re just running RHEL… I hope you’ve seen the post-quantum features of OpenSSH 9.0 too. The SSH client config file (usually found in ~/.ssh/config) is also really useful for twiddling per-directory or per-server configs that you can just set and forget.
Once you’ve done that, your commits will now be signed using your clients’ GPG key, and pushed to their repo using their specific ssh key, and you won’t have to change anything when you start new projects for them, so long as you put them in the same folder.
“What about my IDE?”, I hear you ask. Not to worry, most IDEs use your system’s git and ssh configs, so all this should work just fine with PHPStorm, VSCode, etc.
While I’m sure some bright spark can make this even more dynamic to automate this across clients, I find new clients are rare, but projects turn over fast enough for this to be a real win for getting that first commit signed and pushed correctly, first time.