No, not that kind of modelling! For a very long time I’ve enjoyed making model kits. The first time I ever encountered them was when I was about 6 when we visited a family and their son (about 9) told me all about this thing called “Airfix”. To start with I thought this was some kind of weird glue, but then he showed me some he had built (the staple WWII fighters – Spitfires, Hurricanes, and ME-109s) and I was quite envious.
I don’t remember building many plastic kits to start with, but I did make rubber-band powered flying models from balsa. These require a lot more care and work than plastic kits, but they are very analogue, and you get more of a feel for the materials. I think the smell of cellulose dope helped too. The problem with real flying models is of course crashing them. Balsa and tissue paper are not very robust, and seeing hours of work smashed in seconds is no fun. Modern equivalents tend to use moulded expanded polystyrene, which is both lighter and more crash-resistant, but rather less romantic, and doesn’t smell as good.
Model makers accumulate a certain amount of junk. I still have plenty in my box of goodies:
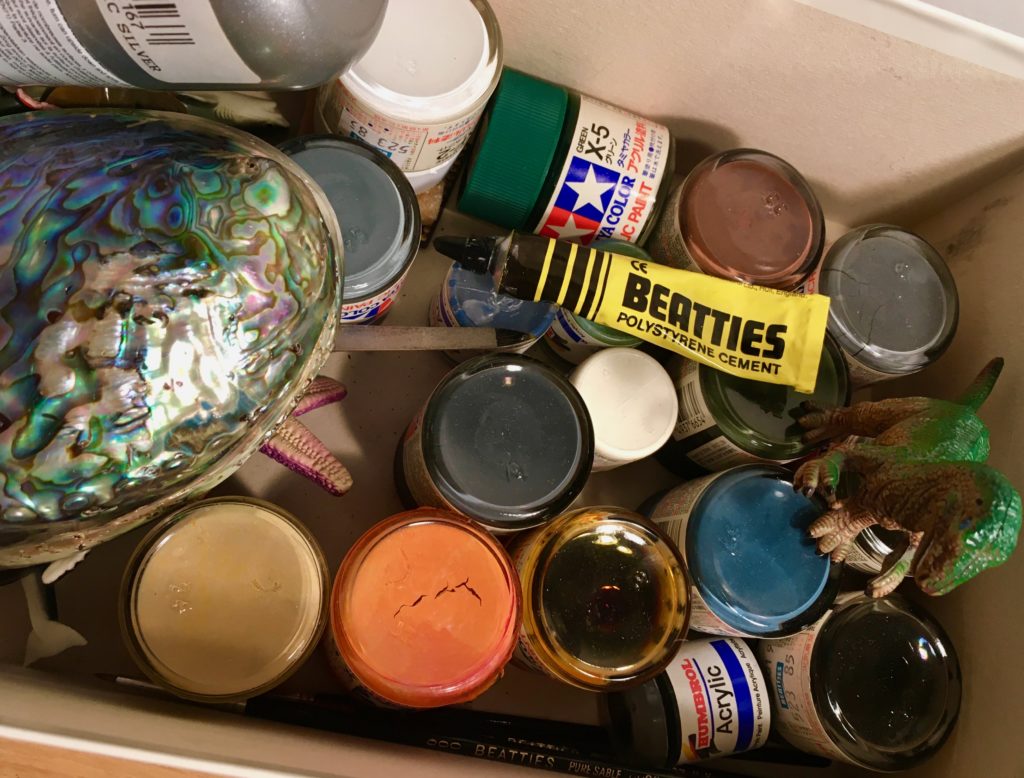
This box reveals a certain history of its own. Beatties was a British chain of model shops that closed in 2001 – yet their glue and paintbrushes still work just fine 19 years later! Tamiya’s acrylic paints were so much better than Humbrol’s gloopy enamels, and they have lasted too – some of these are probably 25 years old! Of course, everybody needs a few plastic dinosaurs, starfish, and a Paua shell.
I’ve always been more interested in the process of making models than playing with them afterwards, and to some extent I’ve found much the same about writing software – writing it tends to be much more interesting than using it. Last year I had a great time building a retro arcade game cabinet – I spent far more time building it than I have playing games on it!
Back in the dot-com boom I landed a very lucrative CD-ROM production contract (you know, where all the web technologies started before they worked on the web!) for the Open University, allowing me to buy a very nice car after a mere 7 weeks on the job – a silver 1991 Porsche 944S2:
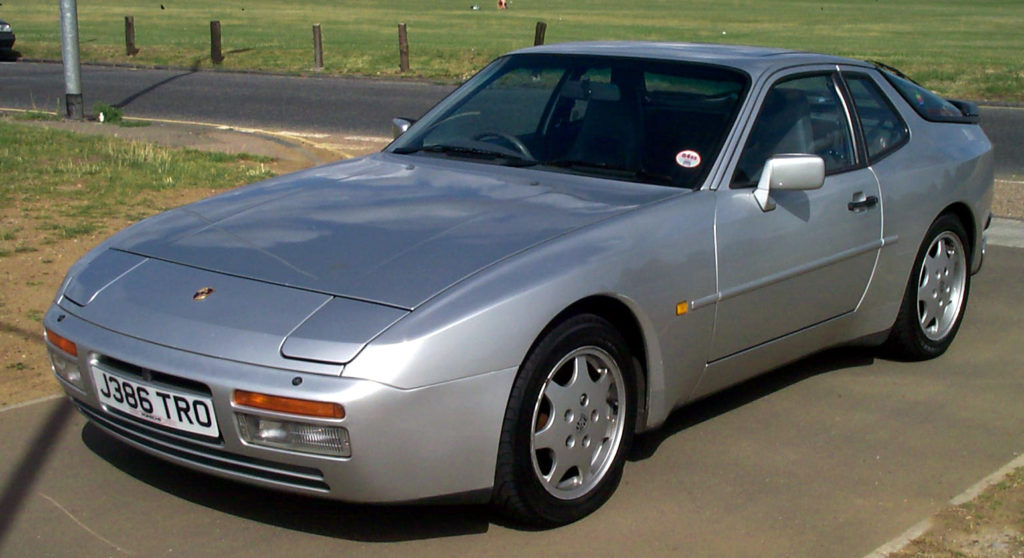
This was a fun, fast, but expensive car to own. It was surprisingly practical: On one occasion my wife and I drove from London to darkest Wales with our luggage and three mountain bikes inside the car. On another trip the clutch was on its last legs and I managed to drive from Newport in south Wales to Sidcup in Kent (190 miles) without changing gear once. I kept the car for 4 years, until we lived in Paris. I can say quite definitively that you do not want to own a nice car if you live in Paris. After I sold it I built a model of it as a memento.
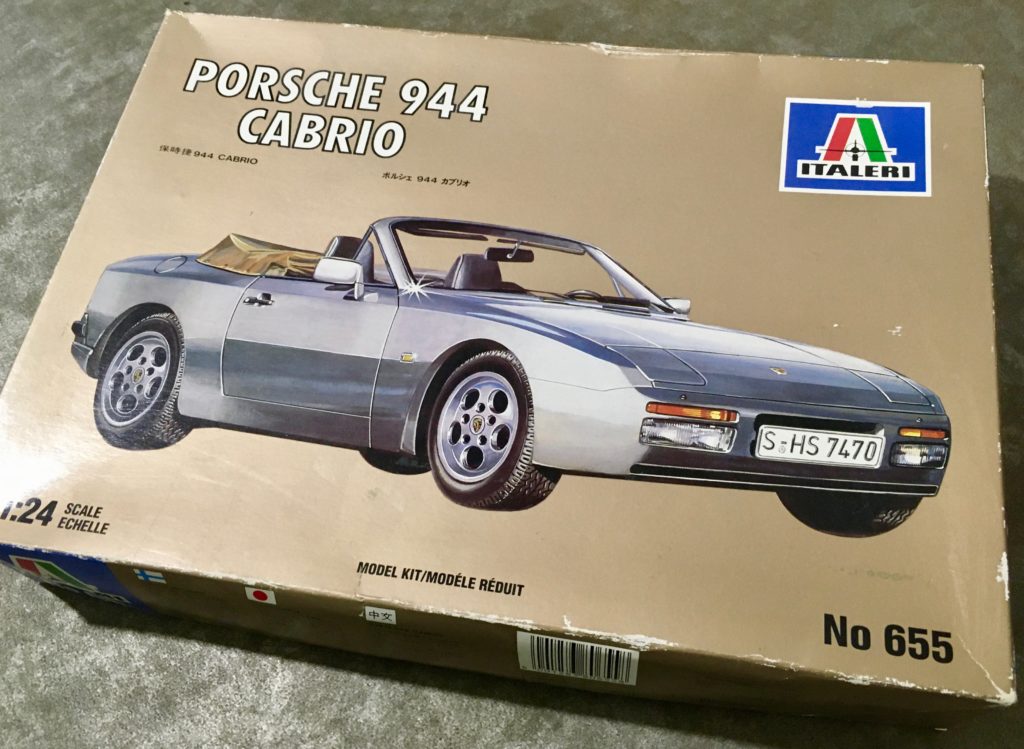
Some friends (hi S&P!) bought a 944 at around the same time as me, but a cabrio, in “Champagne gold”! To complete the set, I bought a kit of the cabrio, but never got around to building it; This box sat on shelves and moved house 3 times over about 15 years:
When it comes to kits, quality varies a lot – part detail & design, moulding quality & accuracy, materials, clear instructions all go towards making the build a good experience. Tamiya make some of the best models (and I always loved their catalogues), with great detail and excellent quality, but sadly they don’t seem to have made 944 models. I built lots of Tamiya kits – aircraft, hovercraft, motorised tanks, dune buggies, battleships. The best of all was a fantastic Vosper Perkasa MTB (motor torpedo boat), which after weeks of work, I was heartbroken to sink and lose in the Thames in Oxford on its maiden voyage.
These two 944 models are from Italian Italeri (the cabrio), and Japanese Hasegawa. The Hasegawa kit is slightly more complex, with an opening bonnet, pop-up headlights, and working steering linkage. My French back then was very bad (it should be better now, having lived in France for 11 years!) and I liked thinking of Modéle Réduit as meaning “model re-do-it”, even though I knew that wasn’t right. While they were the best known, I didn’t really like Airfix kits; designs tended to be a bit simpler and not as detailed. Much the same goes for Revell. I’ve no doubt some model purists will tell me I’m wrong.
In Christmas 2020, amongst all the COVID-19 lockdowns, I finally set about building the cabrio. I was pretty pleased with the results:
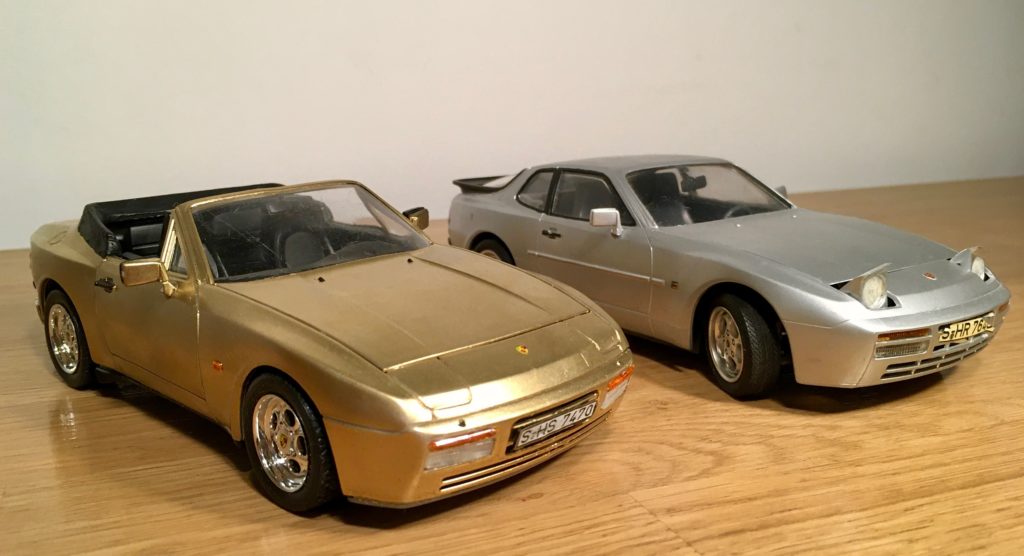

The gold is quite a lot more bling than the real thing was, but I like it. The decals were yellowed with age, very fragile, and disintegrated a bit. I’m particularly pleased with the painting of the rear light clusters, slightly annoyed that I didn’t clean and degrease the body well enough before spraying it, resulting in a slightly uneven finish.
I’ve enjoyed making models for decades now, and it’s been really nice to associate them with good memories too. I’m now tempted to round out the collection with my Dad’s red 944S, my uncle’s succession of purple 968 Sport, 911 993 Carrera 4S, and Cayman R. So much for saving shelf space!