This song takes the perspective of a woman receiving unwanted attention at work, how this makes her feel uncomfortable, and how her friends support her in dealing with it. My intention is to draw attention to the fact that this happens too much, that we (men) should call out this behaviour, and help when we can. In addition to my small attempt at empathy, this is also something of a technical experiment in songwriting which is quite a departure for me. Hit play and keep reading!
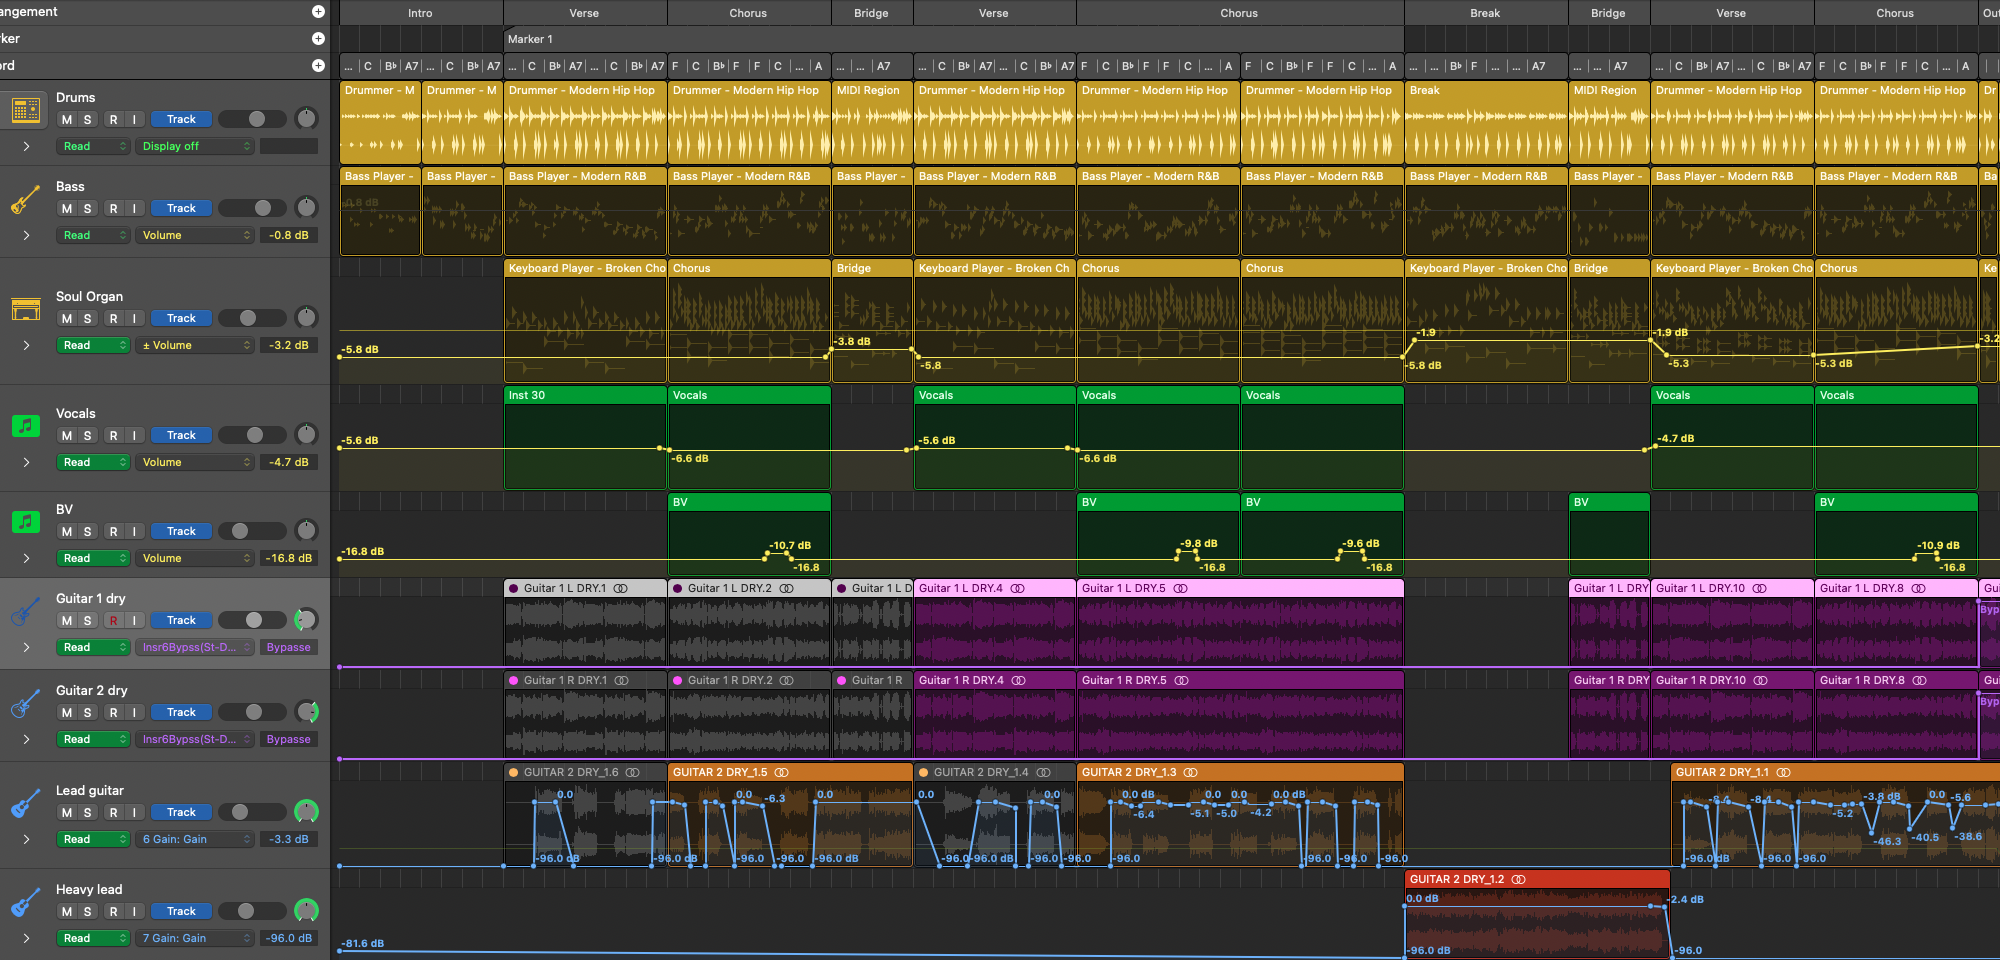
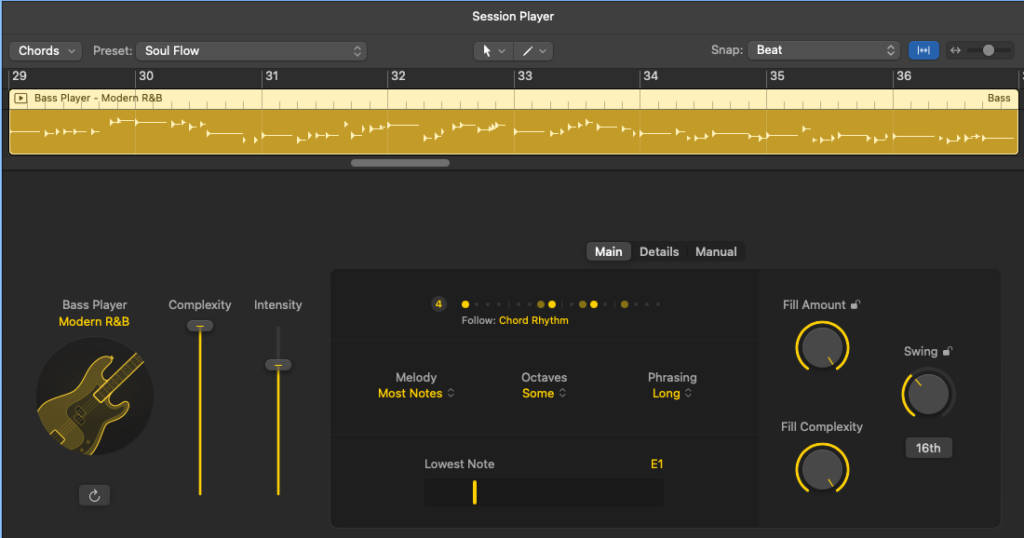
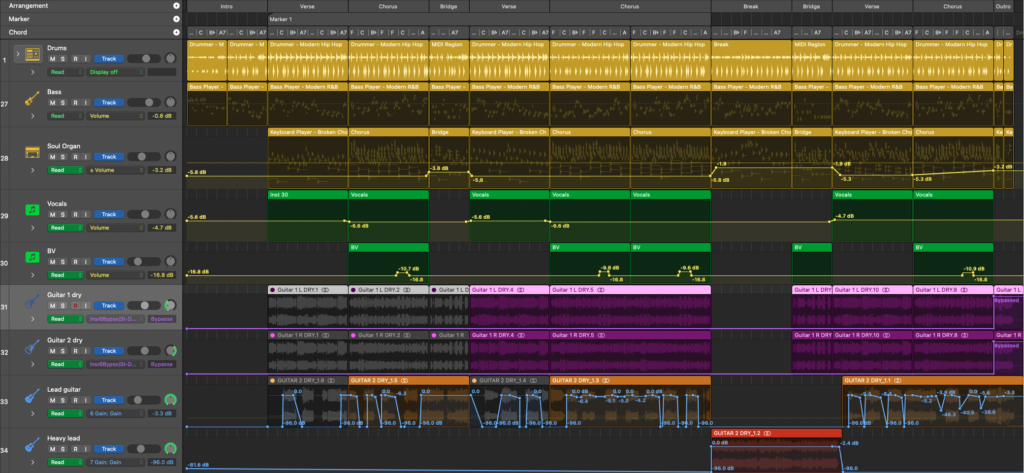
Apple’s Logic Pro 11 added “session players”, virtual musicians that can decide what notes to play, and I thought I’d have a go at using them. There is a long history of generative virtual musicians, like the algorithmic “M” by Intelligent Music (released in 1987, before search engines existed…), and the pattern-based “Band in a box” (released in 1990, and still going!). Logic’s session players are very similar in style to the “drummer” tracks that were introduced in Logic Pro X in 2013 (I feel old!), and that I’ve used extensively, but add a melodic and harmonic layer. This means that they have to be told what chords to use, and so Logic Pro also added a “Chord track” to do exactly that. You can also have separate chord sequences for individual regions within a track so different players can play different chords at the same time, instead of all sharing the global set, but I’ve not used that here.
Now we come to a bigger problem: which chords to play? Logic has an overall key signature, and given that, it can suggest popular chord progressions for the chord track, like i-III-VI-VII, which it uses to pick chords from the current key. I tried messing around with different keys and progressions, and came up with something I liked (ending up in D minor). Then I thought I would try playing with time signatures, as (unlike me) these players don’t get confused by things that are not in 4/4, and ended up with a nice rolling pattern in 7/8, which is also slightly “uncomfortable” and off-balance, which I thought would go well with the theme of the song.
The built-in chord progressions are very limited, and unfortunately, so is my music theory. So I turned to Anthropic’s Claude LLM for some suggestions on how to continue my song:
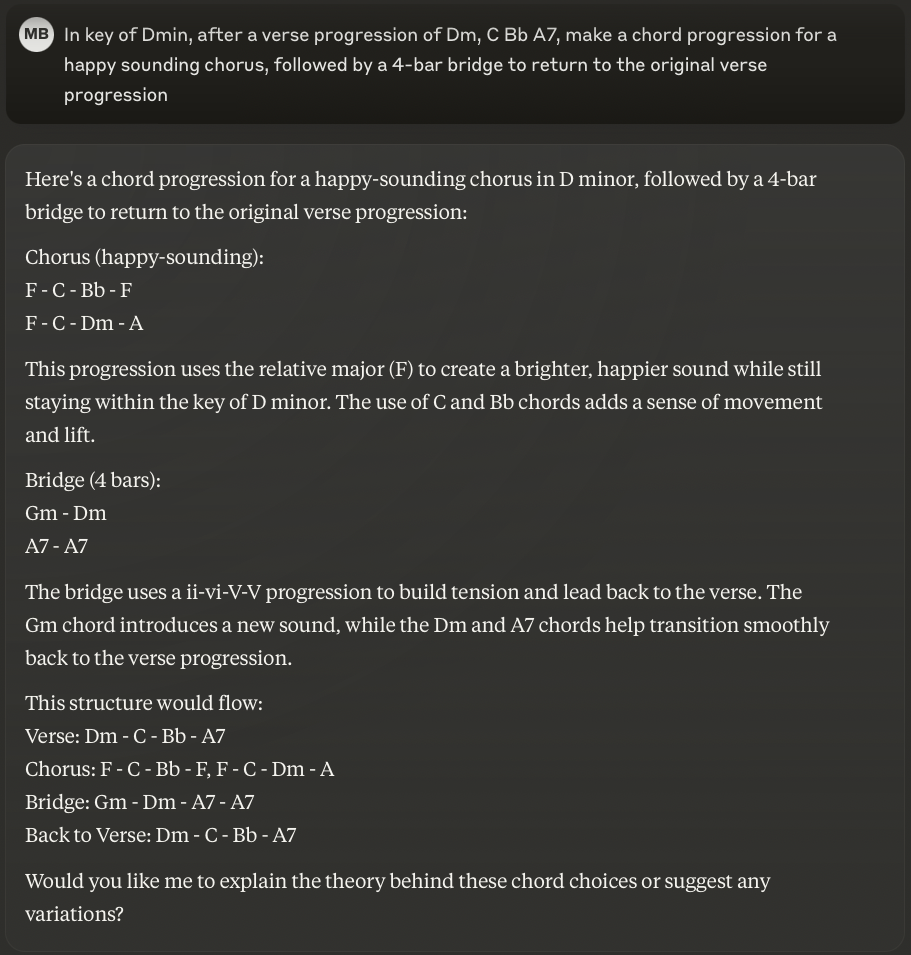
I experimented with variations on this prompt, plugging the chords into Logic until I was happy with the result; you can see the same chord names appearing in the chord track:

It wouldn’t surprise me if Apple goes much further in this direction. With the local AI engine scheduled for macOS 15 and iOS 18, it would seem an obvious target. Music theory rules are far simpler and mathematical than written language, and thus a great candidate for a smaller (when compared to gigantic online models like Claude) learning engine to produce good results in a constrained, lower-resource local environment. The session players already achieve great results without any such AI engine.
I’m not going over the top with these players; I’m using one each of the bass and keyboard players, with very conventional electric bass and classic rock organ instruments, along with liberal use of their complexity, swing, humanisation, and simulation features. I think the bass in particular sounds great, really believable when it’s by itself, like at the very beginning.
With all that done, I had a decent backing track, and it was time for lyrics and vocals.
For years I’ve seen endless stories of women (especially in tech) being subjected to miserable, denigrating, sexist, misogynistic bullshit and unwanted attention. This is something I’ve never had to deal with myself (being a stereotypical cis, middle-aged white man), but I know it happens, and I wanted to do/say something positive that I might not have done/said otherwise. I’m not looking to usurp womens’ ability to stand up for themselves, just to show some empathy. To that end, my inexperience may have resulted in something overly naïve and optimistic, however, I didn’t want to write a negative or pessimistic song, and I doubt many want to listen to one either!
To try to ensure that I wasn’t treading on anyone by doing this, I asked several women to read this and listen to the song before I promoted it anywhere. I received generally positive feedback, from “No red flags” and “…release it. It’s good”, “that’s really cool”, “love the voice”, “We like this”, “it’s a great song to have written. Raising awareness of these kinds of problems helps, [no matter who] raises them”, to understandable concerns about big AI’s inherently exploitative nature, and my presumption of speaking for women. Songs written from a different gender’s perspective are not at all unusual: almost everything by Abba was written by men from a woman’s perspective (and not all of it flattering!); Aerosmith’s “Don’t want to miss a thing” was written by a woman from a man’s. If I was using this song to be negative about women, or to displace someone else’s efforts, I would expect severe and justified pushback, but I’m not doing that, and I think the song has a good message regardless of who wrote it. In the other direction, I’ve not had any complaints from men about how my representation of their actions might be considered unfair – but I wasn’t expecting that anyway. Ultimately, it’s just a song, with a little empathy, and a big dose of technology.
The lyrics are a little cheesy in places (yes, Claude is very helpful for finding rhymes!), and I use “attention” too much, but I hope they do the job of conveying the discomfort of unwanted attention, and the relief when it goes away and you have a support network to fall back on. Some might dismiss this as “woke”, but they are likely the ones that this doesn’t happen to, and I didn’t write this song for them.
[Verse]
I’m minding my own business;
Maybe you should try that too.
Consider that maybe, just this one time,
it’s really not about you.

[Chorus]
I’m not seeking your attention,
just trying to get through my day.
You’re gonna make me uncomfortable
if you carry on this way.

[Verse]
With all this unwanted attention
I could be flattered some other time.
Your persistence won't change my mind;
the decision’s only mine

[Chorus]
I’m not seeking your attention,
just trying to get through my day.
You’re gonna make me uncomfortable
if you carry on this way.

Your inappropriate advances,
just confirm what I should’ve known:
You’re making me uncomfortable;
won’t you leave me alone?

[Break]

[Verse]
No, I don’t need your permission
to choose the people that I like.
My friends respect my life choices,
and support me day and night.

[Chorus]
Now I’ve avoided your attention
my friends say they can see
I’m feeling so much more comfortable
in their good company
For the vocals, I turned again to the still-astonishing Synthesizer V Studio Pro (SV) from Dreamtonics, with its excellent Solaria voice. I’ve written about SV before, if you’d like to know more about how SV works. One specific point that I’ve been asked about is that SV is not “AI” in the ChatGPT sense; its voice models are created from specific individuals who are paid and credited for their work, not by slurping monstrous quantities of stolen, uncredited, unpaid input and generating unethical approximations as most public LLMs do (and I recognise this includes Claude). It’s not a huge sample library like many virtual instruments, but a tuned algorithmic approach, more like what Pianoteq does for piano synthesis, though not going as far back to first principles. I don’t see any ethical issues with using synthetic voices created this way; artistic concerns are are a different matter, though so long as they continue to sing better than me, I will keep using them!
SV still has problems integrating with Logic – its tempo sync is hopeless, so I’ve had to stick to a fixed 100bpm. It lacks support for other time signatures, so bar numbers and loop points are never in sync when working in 7/8, and note placement involves a fair bit of trial and error. Despite all that, it’s still quite workable, and sounds great. I made a particular point of adding breath sounds, which really adds to the realism. I did the backing vocals with SV too, and for some reason I found them quite tricky this time, much more difficult than in my other songs, probably because this song is more complex than my others.
At this point I had a workable song, but it needed something more than a semi-automated backing track. I attempted to play some guitar parts myself, but I found the 7/8 timing difficult (I did find it’s easier counting 1-2-3-4, 1-2-3 than 1-2-3-4-5-6-7), and I’m no good at playing B♭ bar chords cleanly, so instead I found the amazing Wassim Rahmani on Fiverr.com and commissioned him to create rhythm and lead guitar tracks. He did a great job; there’s some lovely, liquid playing here, Clapton-ish in places, and he created a much more satisfying ending than I started with.
After that I needed to mix and master, as usual trying to keep all these parts from treading on each other, dialling back the reverb to avoid muddiness, checking stereo spread, not going overboard on compression or levels. I used Logic’s new Mastering Assistant, which gives nice high-level control over global EQ and dynamics. I’ve previously used Logic’s mastering presets (a less sophisticated approach), and IK Media’s Ozone, but the assistant is easy to use and sounds great.

In all I’m pretty happy with this song. It’s got a good message, and is musically more ambitious than other things I’ve tried, thanks to some artificial assistance. It still feels like an engaging, creative process, but the balance has shifted slightly higher, towards directing and producing, and away from choosing or playing individual notes. I also see clear parallels between what I asked of Claude, and what Wassim did for me, and I’m not sure how I feel about that.
If you like this song, please consider supporting me by buying my albums on Bandcamp, and sharing links to my music on your socials.